Inventory Displays
The InventoryDisplay component will allow you to display the contents of an inventory. It’s designed to be very flexible, and will allow you to create any kind of inventory to match your game’s visual style. You can see examples of it in the PixelRogue1 and PixelRogue2 demo scenes.
Creating an inventory display
An inventory display is made of a lot of components and subparts, so it can quickly get quite complex, and setting them up by hand would be tedious. Fortunately, the InventoryEngine comes with an auto setup that handles all that hard work for you.
To create a new InventoryDisplay, you’ll first need to have an Inventory in your scene. Then, inside a Canvas object, create a new empty child. Add an InventoryDisplay component to it, and fill its inspector fields.
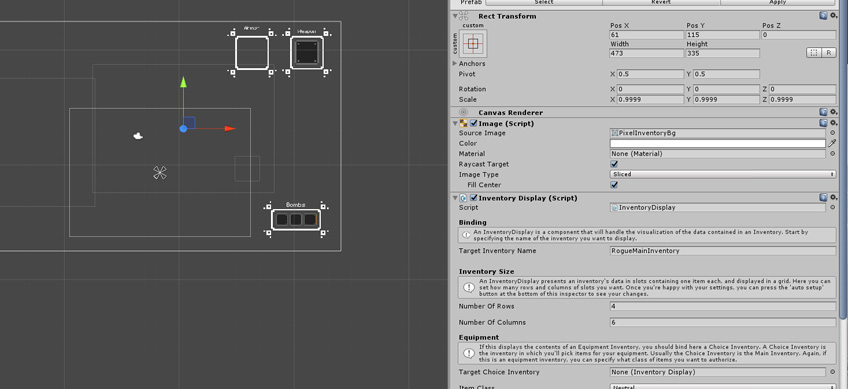
The help boxes in the inspector should help filling it properly. The most important fields is the Target Inventory Name, which must be the exact name of an existing Inventory in your scene, and the number of rows and columns, which will determine the size of your inventory. 4 rows and 6 columns for example will result in an inventory size of 4x6, or 24 slots, allowing you to store a total of 24 different items.
Once you’re done filling the fields, you just need to press the Auto Setup Inventory Display Panel button at the bottom of the inspector and it’ll create all the subparts, grids, slots, etc. that are needed for the display to function.
That’s it, you’ve got a functioning Inventory Display.
Slots
An Inventory Display is basically a grid of Slots. A Slot is an object that will hold an item (or a stack of items), and allow you to select it, and trigger actions on it (equip, drop, etc). You define the slots’ properties from the InventoryDisplay’s inspector.
From the InventoryDisplay’s panel you’ll be able to specify your slots’ size, the size of the item’s icon inside it, the margin between slots, and the various images to use for your slot, whether it’s empty, filled, highlighted, pressed, disabled or being moved.