Inventories
Inventories, as you can imagine, are the core of the Inventory Engine. They’re the component that will store items and allow you to interact with them. They’re basically a list of items. They’ll handle save and load of that list, and give you methods to know whether or not they contain a certain object, or a certain type of object. Note that inventories are invisible, and displaying their contents is handled by a different component : InventoryDisplay. You can have as many inventories as you want in your scenes.
An inventory is defined by its size, that you can set via its inspector (Content > Size), or via the InventoryDisplay directly, a type, and a Target Transform (used to know where to spawn dropped objects, it’ll usually be your main character).
Inventories can have two types : main (regular inventories) and Equipment. Equipment inventories will have special methods to know what item is currently equipped. A typical use case is to have two inventories : a main inventory where you store items, and a Weapons inventory, where you’ll equip your current weapon. But you could have more. If you were to create a game like Diablo for example, you’d have a main inventory, a Helmet inventory, a MainWeapon inventory, a Shield inventory, a Bracers inventory, a Potions inventory, etc.
Creating an inventory
Creating an inventory is very simple. All you need is to create a new Empty Game Object in your scene, and add an Inventory component to it.
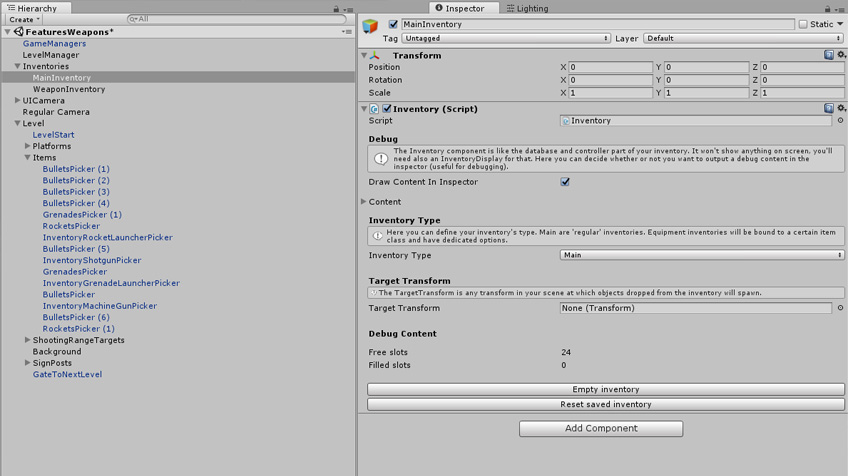
The name you’ll give to your inventory object (Main Inventory in the screenshot above) is very important, as that’s how you’ll access your inventory, and you’ll need to reference that name in items, inventory displays, etc. You can then define its Content’s size and inventory type. Finally, you can set its Target Transform. If your character is already in the scene, you can drop it into that field. If you’re using the Corgi Engine, this binding will be done for you via the CharacterInventory ability, so you can leave it blank.
Inventory Events
The engine will trigger events at pretty much every inventory interaction. These events are used by the engine’s classes to interact between each other, and you can of course listen to them from any class. This will let you trigger anything you want every time an item gets used, moved, something gets selected, etc.
To do so, you’ll want to listen for MMInventoryEvent. You can look at the EventTester class, which showcases both the code you’ll need to listen to an event, as well as how to filter on a certain event type. Make sure you check its comments, it explains all there is to know about it!
Here’s the full list of inventory events that get triggered by the engine :
- Pick
- Select
- Click
- Move
- UseRequest
- ItemUsed
- EquipRequest
- ItemEquipped
- UnEquipRequest
- ItemUnEquipped
- Drop
- Destroy
- Error
- Redraw
- ContentChanged
- InventoryOpens
- InventoryCloseRequest
- InventoryCloses
- InventoryLoaded
Multiplayer
The engine comes with local multiplayer support, meaning you can create any number of inventories, for as many players as you’d want, and have them interact with these inventories separately, collecting, equipping and using items like they would in single player. The PixelRogueMultiplayer demo scene showcases that.
Creating multiplayer inventories is as simple as creating a regular inventory. On most InventoryEngine components’ inspectors, you’ll notice a PlayerID field. This PlayerID has to be consistent across all components tied to a player. For example, if you have two players, each with their Inventory, and an InventoryDisplay, you’ll want to make sure to have two separate Inventory components, ideally on two objects, and two InventoryDisplay. Set PlayerID to Player1 on player1’s Inventory and InventoryDisplay, and Player2 on player2’s Inventory and InventoryDisplay.
If you use InventoryDetails, InventoryInputActions, InventoryInputManager or InventorySoundPlayer, you’ll also want to specify the correct PlayerID on each of these.
Once that ID is correctly setup on your inventories and their UI components, the last thing you’ll want to do is make sure items go to the right character when picked if you’re using item pickers. This is done by adding an InventoryCharacterIdentifier to your character. The ItemPicker class will “read” that ID when picked, and will make sure the item goes to the right inventory.